Although most of my professional life is software (which tends to overflow into personal projects) this section of the website is dedicated to recording the computers I bring back to life (or my failures in doing so, where appropriate!) I got into this in early 2019 when I determined it was time to revive my original Mac Plus that has traveled the continent with me for two decades, slowly losing its will to live. I learned a lot doing that — and managed to avoid electrocuting myself — then decided it might make a fun and profitable hobby for my son and I.
As you’ll see from the entries, the profit part is usually missing, but restoring these little bundles of computer history has other rewards. Plus, having a hobby keeps me (and Nicole!) sane.
You can scroll through the post history in the section, and see them all, or use this index to jump to your favorite machine…
Apple IIGS
Apple IIc
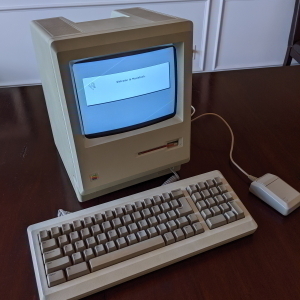
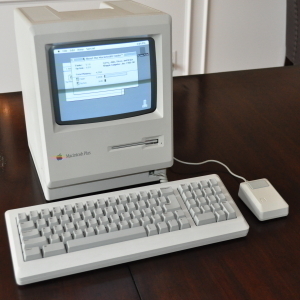
Macintosh M0001
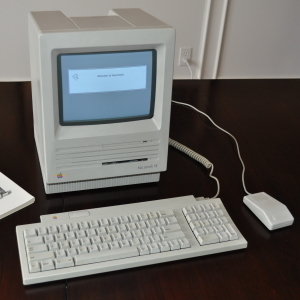
Macintosh SE
Mac Plus
20th Anniversary Mac
Color Classic
Atari Mega ST2
Atari 1040ST
Apple IIc+
NextStation
Mac Classic II
Got an old computer you want restored? Or some data on ancient floppy disks you’d like to see again? We love a challenge — contact us!
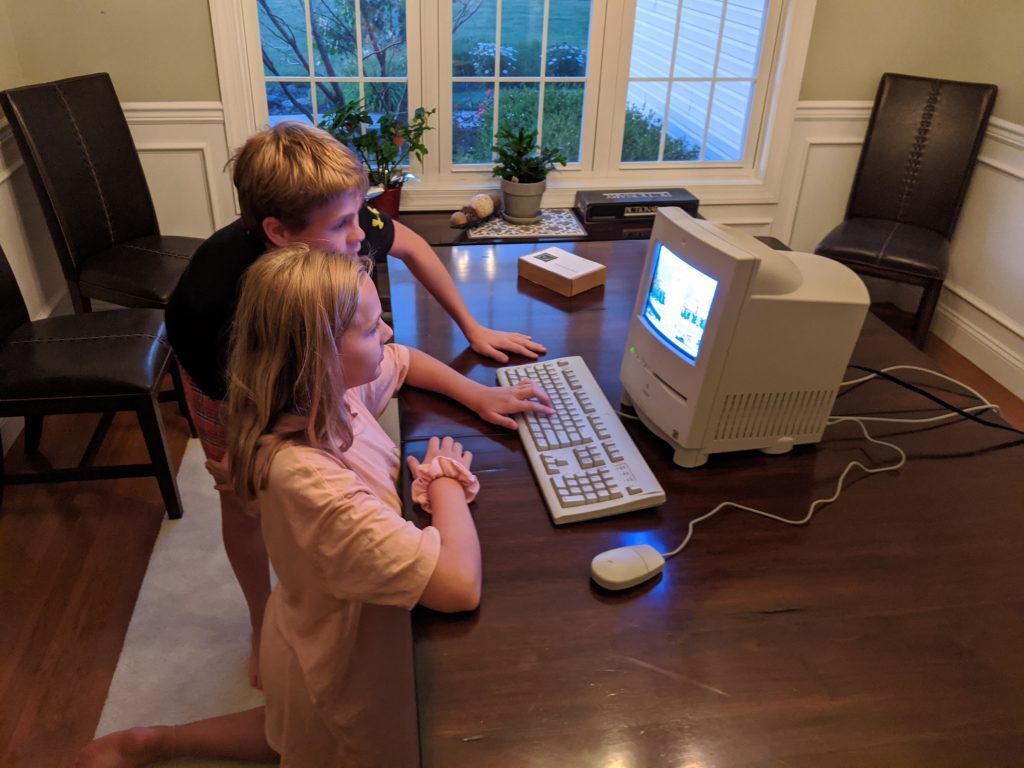
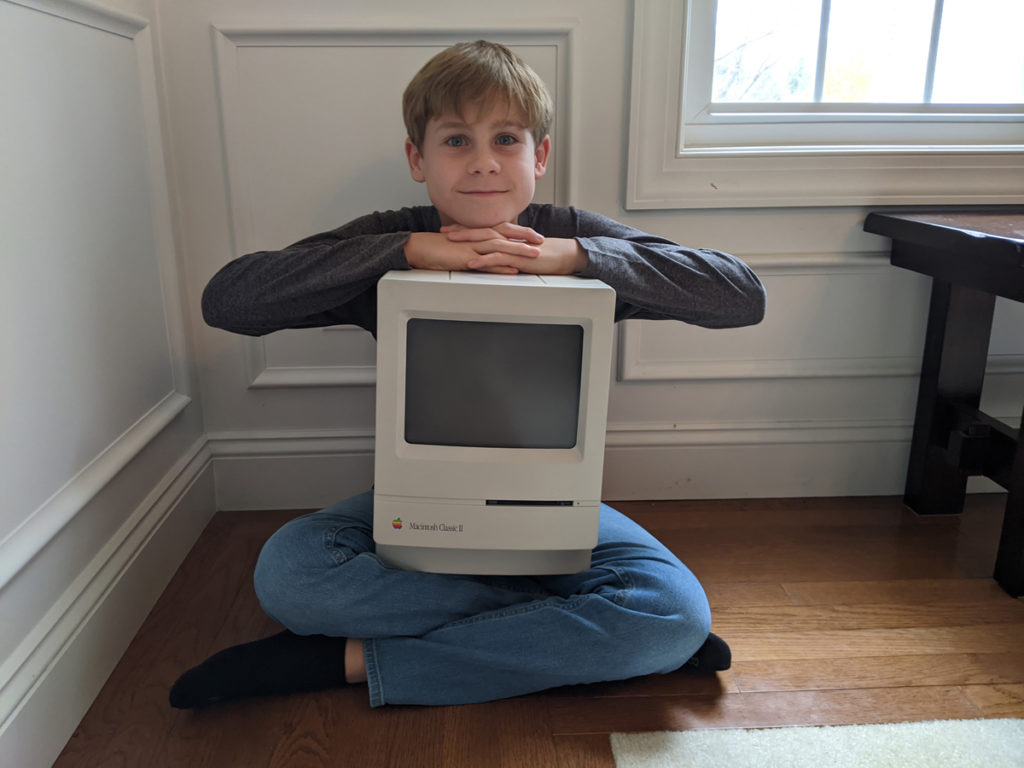
I normally only post these projects in their own separate little nerdy section of the website, but this one was special, ’cause my son had the lead…
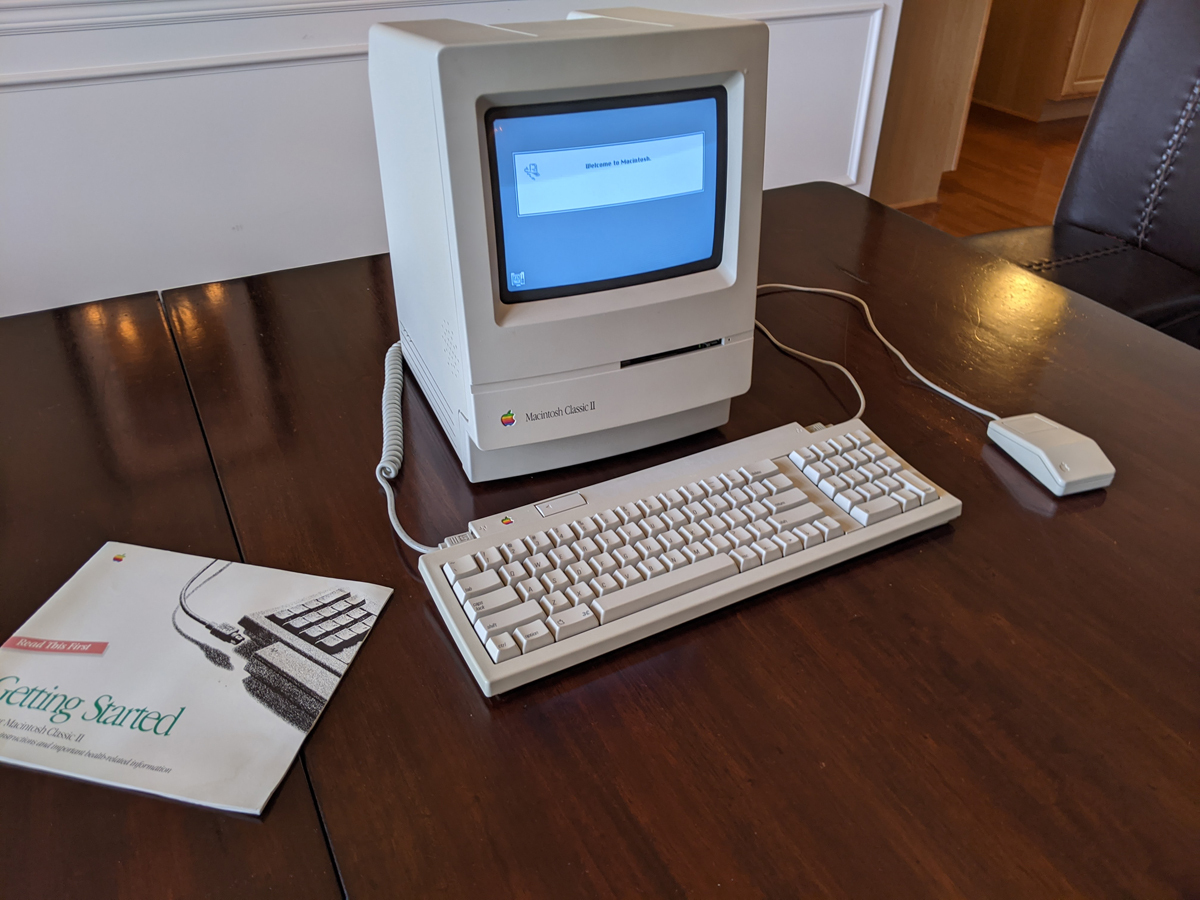
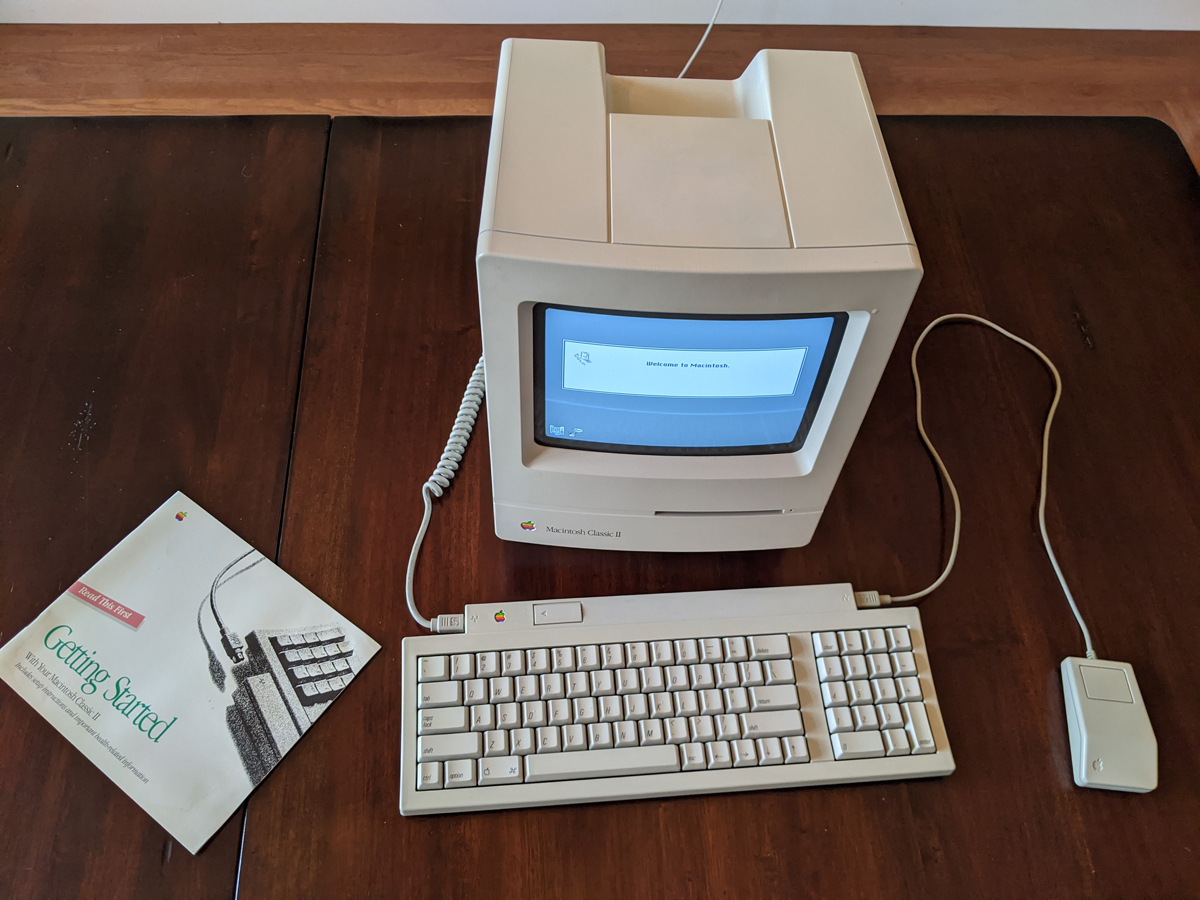
The Classic II was no one’s favorite Macintosh. A compromised system architecture (a 32-bit chip throttled by a 16-bit data path) made it a poor replacement for the now-legendary SE/30, it did find itself a niche as a low cost compact computer for education. That was the history of our Classic II: purchased from a retired teacher, who’d acquired it after it was retired from a classroom.
The cosmetic condition wasn’t well-disclosed on the Facebook Marketplace listing: previous attempts to remove the permanent marker identifying it as classroom computer “#30” had resulted in stripped finish and smeared marker on the top of the computer — which had been covered by a mis-matched off-white paint. The keyboard had similar markings, although without the attempt at removal.
Cosmetics aside, the computer was also deader than advertised: “works as great today as it did 15 years ago!” bragged the listing… but powering it up did not include the happy chime (or even a sad one) and the display very slowly warmed up to a dim checkerboard pattern. Clearly this particular Mac needed some love. Given that I purchased it for only $60, and that only true fans would mourn its possible death, I decided this would be the perfect project for my son to go solo on.
I took care of the plastics, removing the paint with hot water followed by a baking soda scrub. The permanent marker mostly came off with a 50/50 mix of isopropyl and acetone. A dunk in a liquid peroxide 40v at a 20/80 mix with hot water and a few hours in the sun, and it came out looking pretty respectable — given its history.
Ben built an inventory of the through-hole capacitors on the analog board, which I double checked, and I identified most of the SMDs on the logic board. A trip to Mouser.com and a few days for shipping, and we had a box of new parts. It took the better part of two months, but after school every day Ben would de-solder 4 or 5 caps, then re-solder and mark the replacements. He did the whole analog board, with only a few touch-ups from me. One pad lifted on removing a stubborn cap, but did not break. We tested for continuity, then reinforced with hot glue.
Re-assembly is a pain on these old compact units — especially after a couple months during which we forgot exactly how it came apart! But we got it back together, ran a long extension cord to power strip in another room, crossed our fingers, and powered it on. When the circuit breaker did not trip, we peaked around the doorway and saw the screen bright and clear and booting happily from the old hard drive! At this point, I had cleaned, but we had not re-capped, the logic board, so we weren’t entirely surprised that there was still no happy chime, nor sound when triggered from the Control Panel. Off it went for another tear down.
Before starting the logic board, we practiced a hot air and solder paste technique on a junk board. While that went very smoothly in rehearsal, it did not work as well on the old Mac. The paste spread too far, and formed little bridge balls in undesirable areas. We decided to go with our more proven approach with traditional solder. Removing SMDs is nerve-wracking no matter how you do it, but I’ve had the most luck with cutting off the top and gently pulling the remains off their pins, before using heat to dispatch the remnants and clean the pads.
After taking lots of pictures, Ben patiently removed all of the old SMD caps, and replaced each with a tantalum cap. Some angles were difficult for our little lefty, and he cleverly came up with a sideways mounting approach (that I ultimately re-did with my right hand). After each grouping, we’d slide the logic board back in and re-test. After the second set, the happy chime was finally heard! Ben completed the remaining caps the next day, and he gave it a fresh OS install using my Floppy Emu — his first end-to-end restoration! Not bad for a 13-year old!
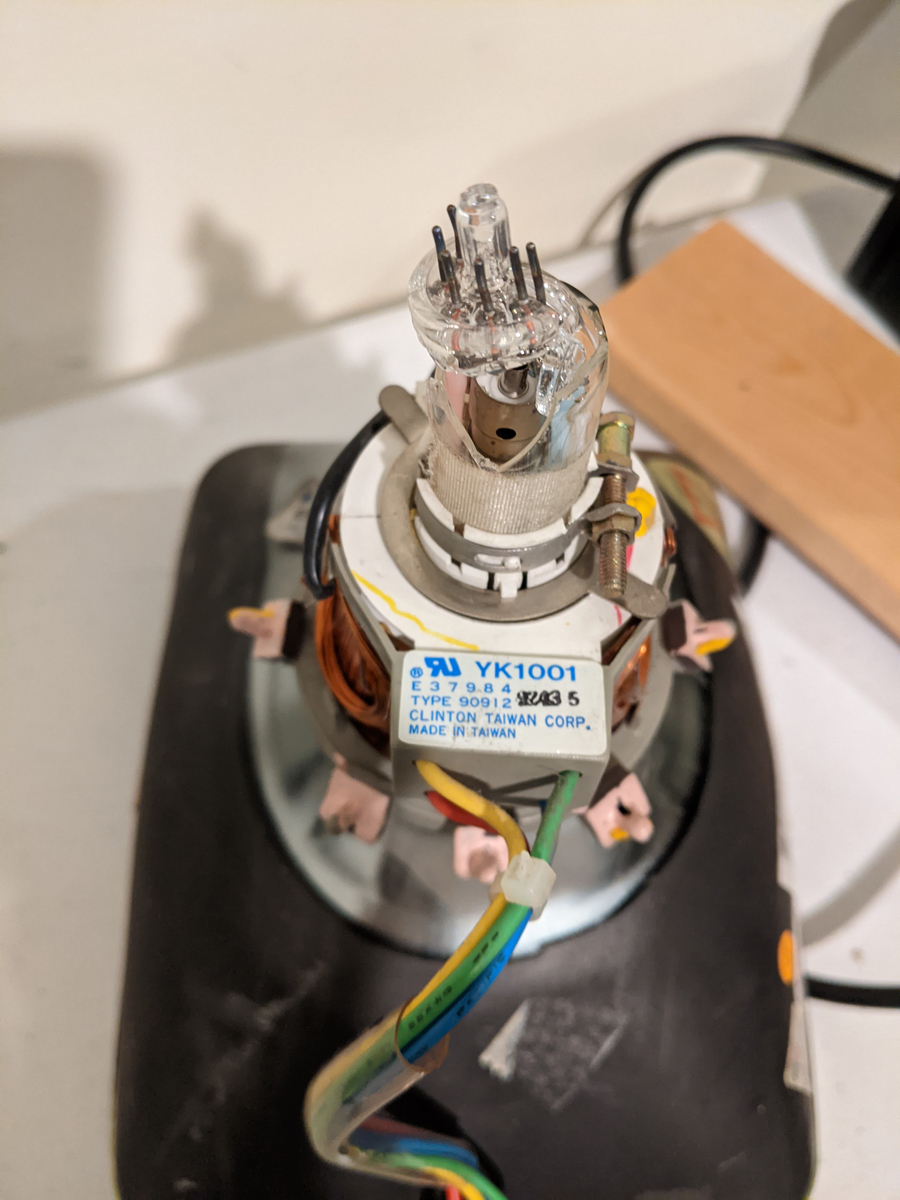
After he went to bed that night, I went to perform a few final adjustments, including the scary high-voltage tweaks to calibrate the display. As I removed the case, the insides slid unexpectedly and cracked the neck of the CRT’s vacuum tube. I was heart broken — there’s no repairing a vacuum seal! Fortunately, I have a couple spare-parts Macs in a closet, and after some advice from the nerds online, Nicole and I discovered that the CRTs can be swapped — as long as the yoke connector is (very carefully) ported over to the doner. There remains a small amount of bowing in the bottom right corner that we don’t recall having seen on previous power-ups: possibly the tube, possible that we didn’t mount the yoke connector with exact precision. Given how close we got to perfection, despite all its been through — and the risk associated with fragile high voltage electronics, we decided to call it a win.
I offered to sell the Mac and let Ben keep the profit — including about $14 worth of capacitors, the spare CRT, and about $10 to replace a missing keyboard cable, we spent less than $100 on this restoration. It could likely sell fairly quickly for $150-200 — not a bad flip for a 13-year old. But he’s opted, at least for now, to have it in his room. We don’t allow Internet-capable devices in bedrooms, but a 29 year-old Mac is fairly safe — and he’s certainly entitled to have it in a place of pride!
Note: This post is available in Portuguese at Macnarama.com
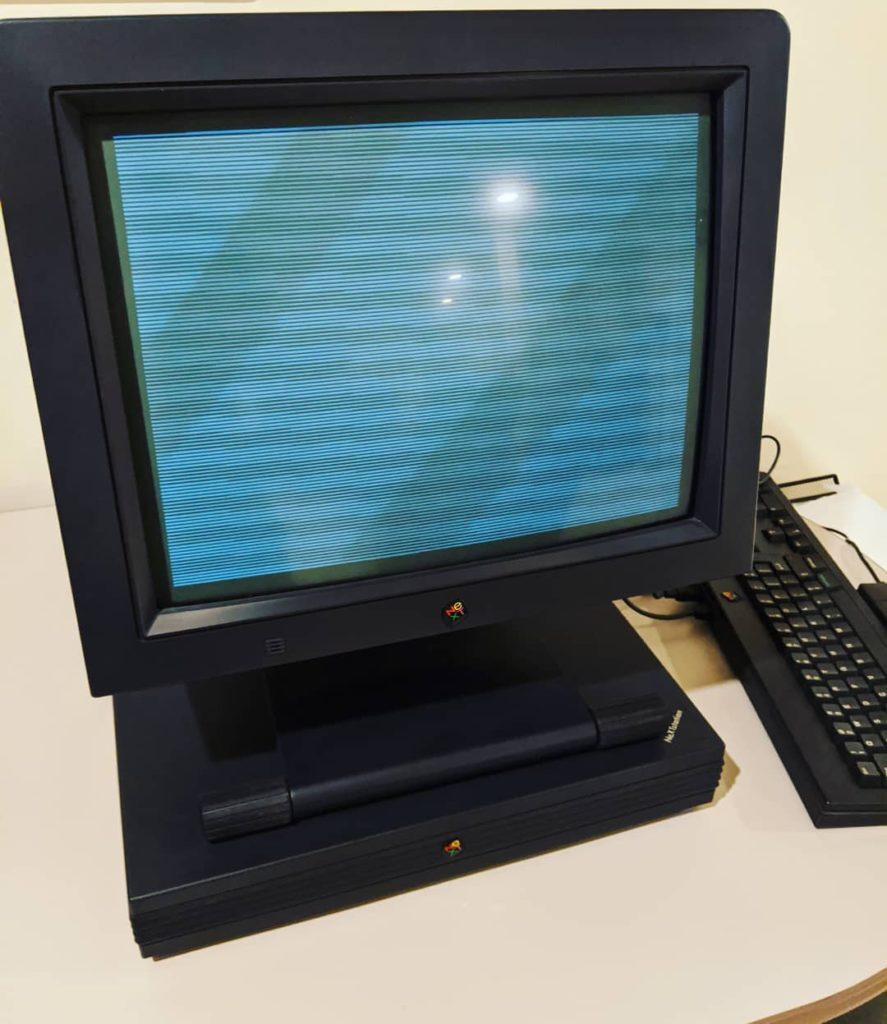
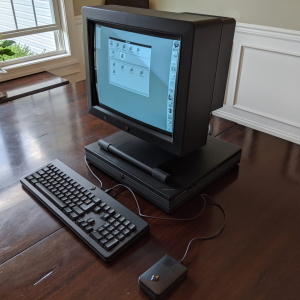
Despite its unwieldy size and disappointing performance, NeXT cubes remain a sought-after collectors item — one recently sold on eBay for over $3000. I was lucky enough to get my hands on the follow-up machine, called the NeXTstation (or pizza box) for a fraction of that price. Of course, it didn’t work, but that’s never deterred me before. While it started its life at the University of Pittsburgh, it had spent its retirement years in storage. I met the seller halfway to Pittsburgh for the hand-off, brought it home, and fired it up to a diagonal line pattern, reminiscent of the “checkerboard” display on a dead classic Macintosh.
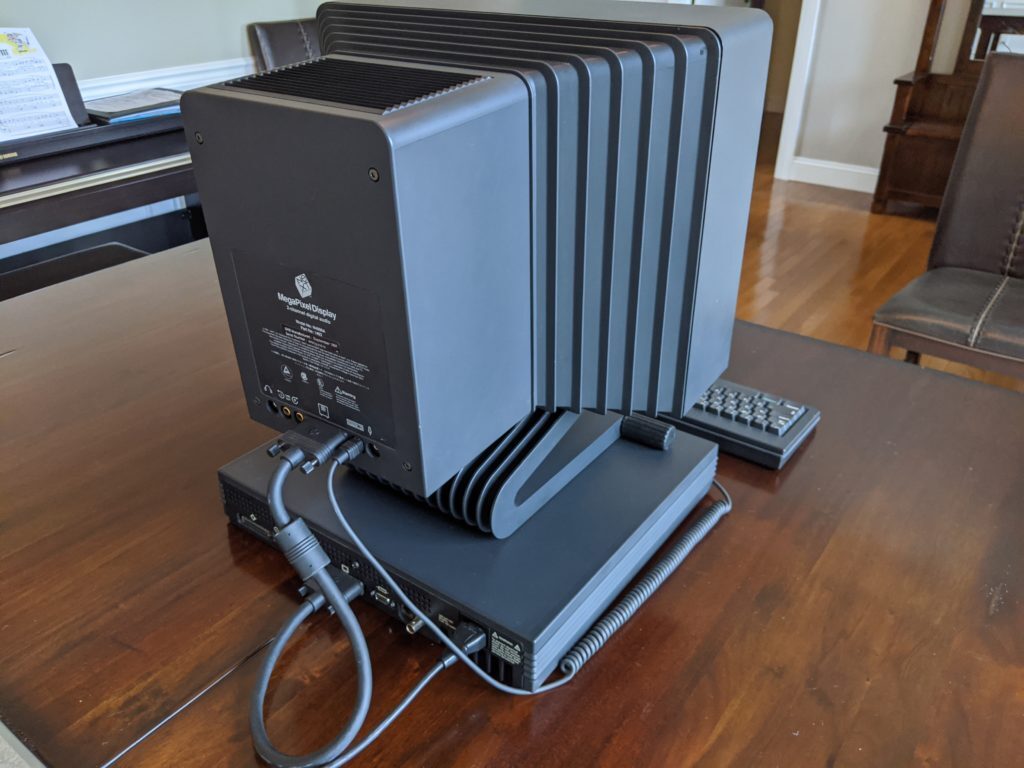
After all the normal maintenance tasks, like cleaning the logic board, and re-seating the RAM and anything else removable, the first order of business was to isolate the problem — was it the monitor or the computer generating the image? Unfortunately, without parts to swap, this was hard to do. The NeXT is a complete system: the monitor gets its power from the computer, the keyboard connects to the monitor, and a key on the keyboard tells the whole thing to turn on; there’s no power switch, and no easy way to fire up the system without the monitor. I ended up looking-up the pin out for a VGA cable, then splitting out the specific pins for the video signal (the NeXTstation is monochrome, but all my VGA monitors are color, so I ran the video signal to green) to another display, routing the rest back to the original monitor for power and keyboard. This hack allowed me to get an image on a known-good monitor, verifying the issue was with the computer, not the display.
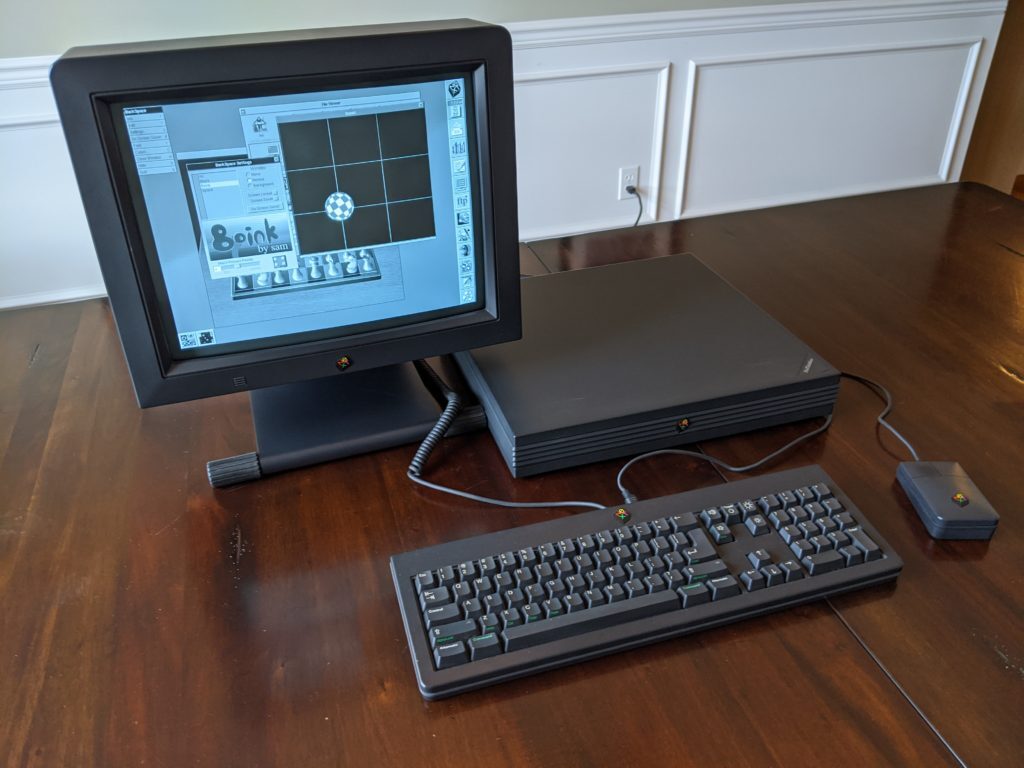
Impressively, but unfortunately, the design of the pizza box is quite sophisticated: there are very few independent parts, and short of re-capping and re-chipping the whole logic board (the latter probably near impossible) there was really no repair that could be done. Fortunately, Black Hole, Inc had new-old-stock logic boards available, and sold me one for a reasonable price. Once installed, the NeXT sprang back to life — and demanded a password I didn’t have. The owner at Black Hole has all the old documentation online, so I was able to hack my way in, reset the password, and configure basic networking. I was amazed that the Quantum Fireball hard drive was still spinning — but didn’t realistically expect it to last long, plus it had no space for an OS upgrade. The machine came with NextStep 2.2, but I wanted to get to at least 3.3. A SCSI2SD was in order… getting it working was another ordeal.
Instructions in the forums provided the necessary information for configuring the SCSI2SD, and after some fidgeting, it was recognized by the machine. Black Hole sold me a SCSI DVD-ROM, and I burned an ISO of NextStep 3.3 using a more modern computer. To connect it to the system, I used an old hard drive enclosure for a Mac, and a SCSI 2 to Centronics cable. I also had to raw-write a boot floppy image. The floppy booted, handed off to CD, which formatted the SCSI2SD without complaint, then wrote the NS3.3 bits to the SD Card. Everything looked good until I tried to boot from SCSI2SD — the system would just hang. After repeating these steps, with minor variations, and messing with SCSI termination, I finally just pulled the SD card out, plugged it into a modern Mac, and with some help from this blog post, used DD to write a pre-made NS3.3 image to the card. Once re-installed in the NeXTstation, everything worked perfectly. I needed a mounting bracket to make the SCSI2SD sit securely in the case — but fortunately another hobbyist had published one that was a fairly quick 3D print away.
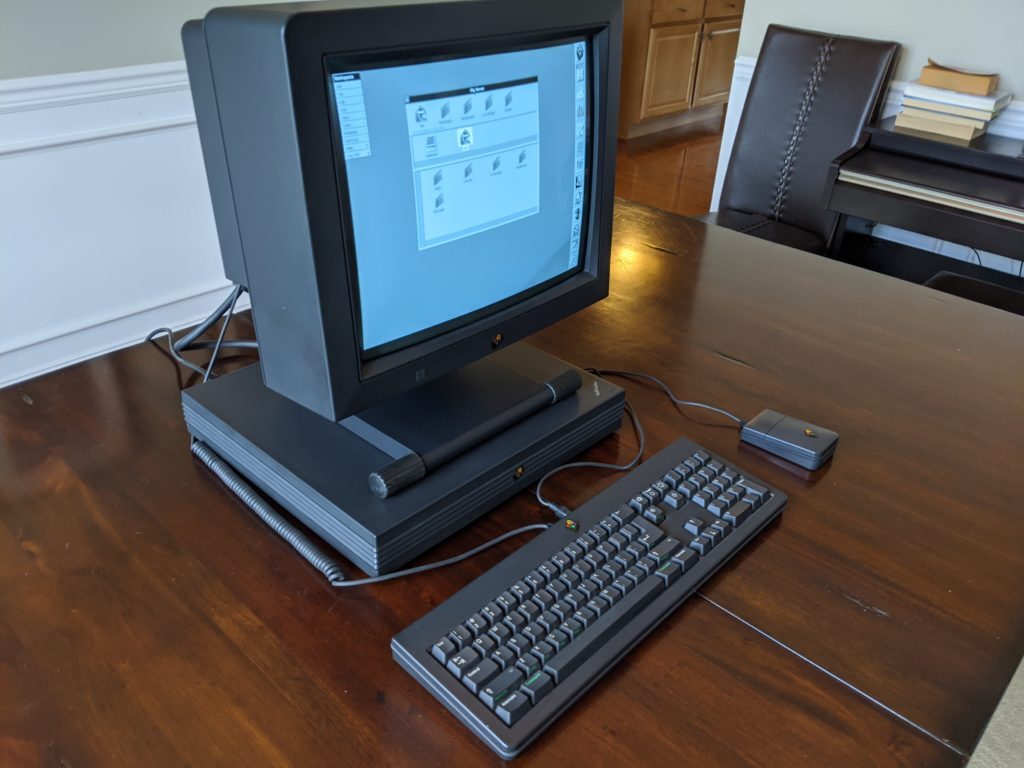
The final step was to pull anything valuable off the old hard drive. For that, I rigged up a FTP server on my G4 Cube, and command line “put” things from the old, then “get” over to the new. The machine came with Mathematica 2.2, which I badly wanted to play with, but the license was invalid, and Wolfram was unable to help with a replacement key. I worked around by extracting a copy of Mathematica 1 from a NextStep 1.0 disk image I found online.
Although NeXT failed as a company, they were acquired by Apple in the late 90s — providing an infusion of needed tech, and a way to get Steve Jobs back in the captain’s chair. After a few false starts, NeXTStep (aka OpenStep) became the core of Apple’s OS X, and in turn, the core of iOS, iPadOS, and tvOS. All of Apple’s successful products for the past 20 years trace their lineage to this black slab, and its quirky but powerful operating system. For these, and other reasons, the NeXTstation likely has a permanent home in my collection.
Software and bits I collected during the restoration can be found in our Public OneDrive share.
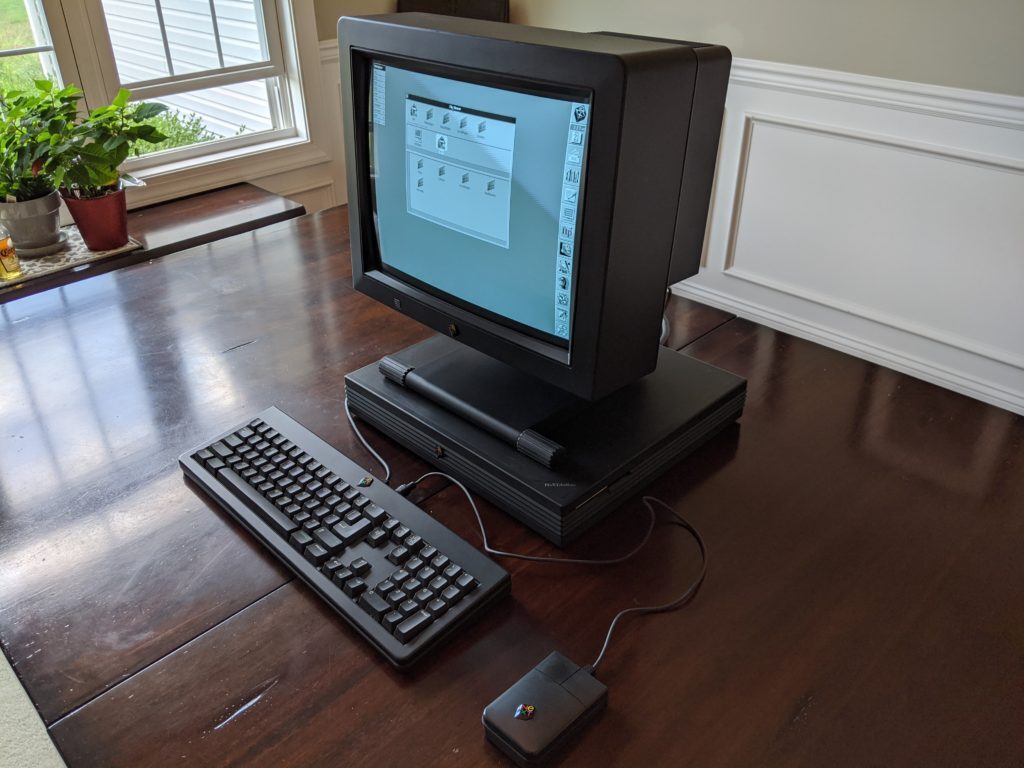
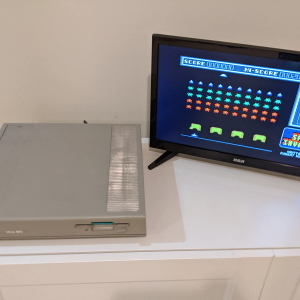
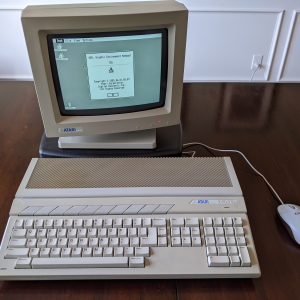
This is likely to be my last post about 16-bit Atari — I did not enjoy my time with these computers (despite lusting after them for so many years.) I bought this to troubleshoot issues with my Mega ST 2, and did the requisite service, but this was not a machine I fell in love with.
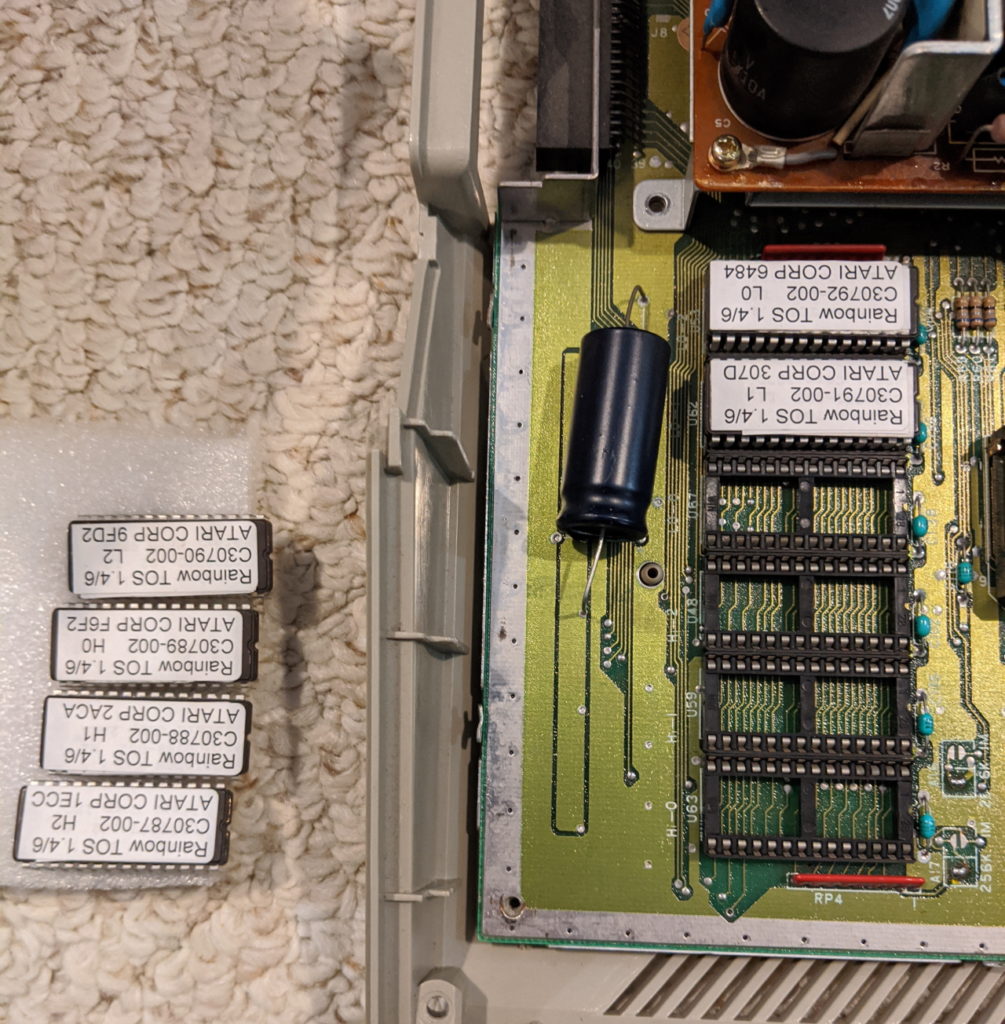
The machine came with 1.0 TOS ROM chips, and evidence of some historical power supply blow-out. I upgraded the operating system — by yanking out the aforementioned chips and installing new ones, re-capped the power supply, and scrubbed as much carbon scoring from the case as I could, before a gentle retro bright bathe.
The matching monitor I acquired through the Mega ST deal, but it was too difficult to disassemble, so I tried a new retro-bright technique. This one is mostly about a pure soak in the sun, but augmented with an occasional application of 40v diluted with water (about a 80/20 mix) applied liberally with a paint brush. The theory here is that its actually the heat that is the catalyst for color change, and I’ll be honest, it worked quite well. A liquid bath is still preferable, but I’ll adopt this technique going forward for devices with challenging disassembly and low value.
Everything cleaned up nicely, but multiple attempts to acquire a matching mouse failed. I settled for a PS/2 adapter, and a white PS/2 mouse. I also purchased an unfortunately named device called a “SatanDisk” (not to be confused with the superior “UltraSatan“) so I could load up my curated hard drive image onto a SD card adapted to the Atari’s hard drive connector.
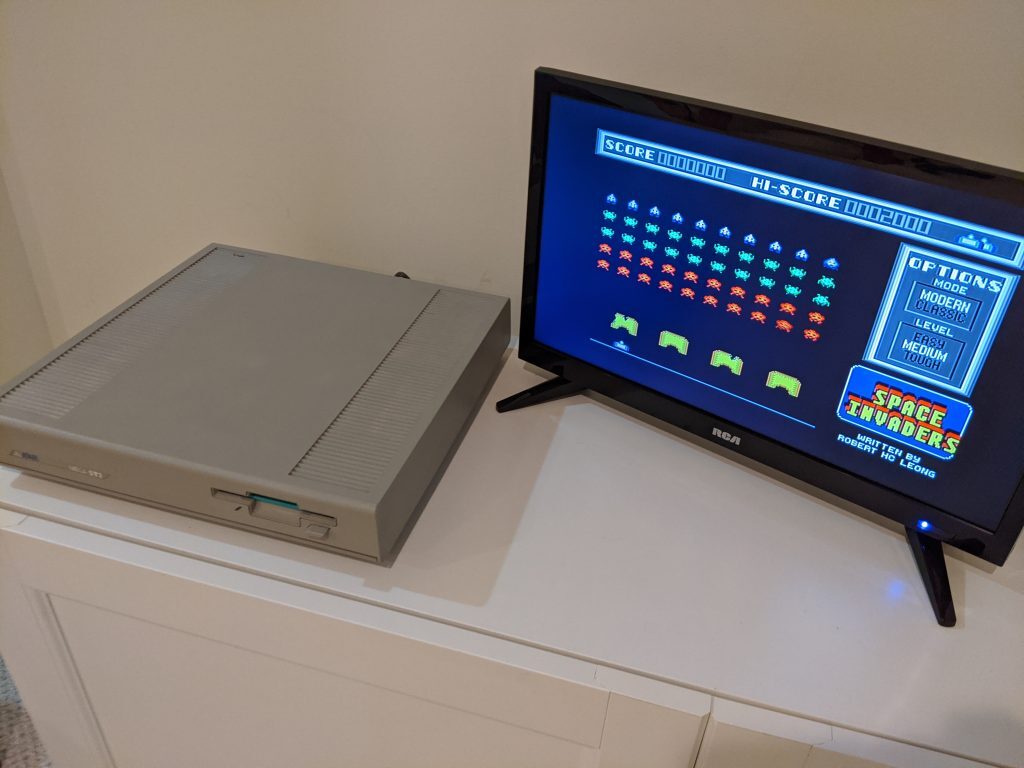
Because this model did not include an RF Modulator (that wouldn’t be available until the 1040 STF) getting color out of it with a modern display is challenging. I purchased a cable from England that worked with one of my VGA monitors (although the monitor permanently displayed a warning that it did not prefer the Atari’s 15 khz refresh rate) and tested color. I also cleaned the heads on the floppy drive, and tested it.
Ultimately, I didn’t keep this one long — it was less capable than the Mega, and frankly underwhelming compared to Apple machines of the era. The bundle sold for about what it cost to put together, although I lost a little on eBay fees and shipping. I’m glad I got to play with one, so I’ll know better than to buy these in the future…
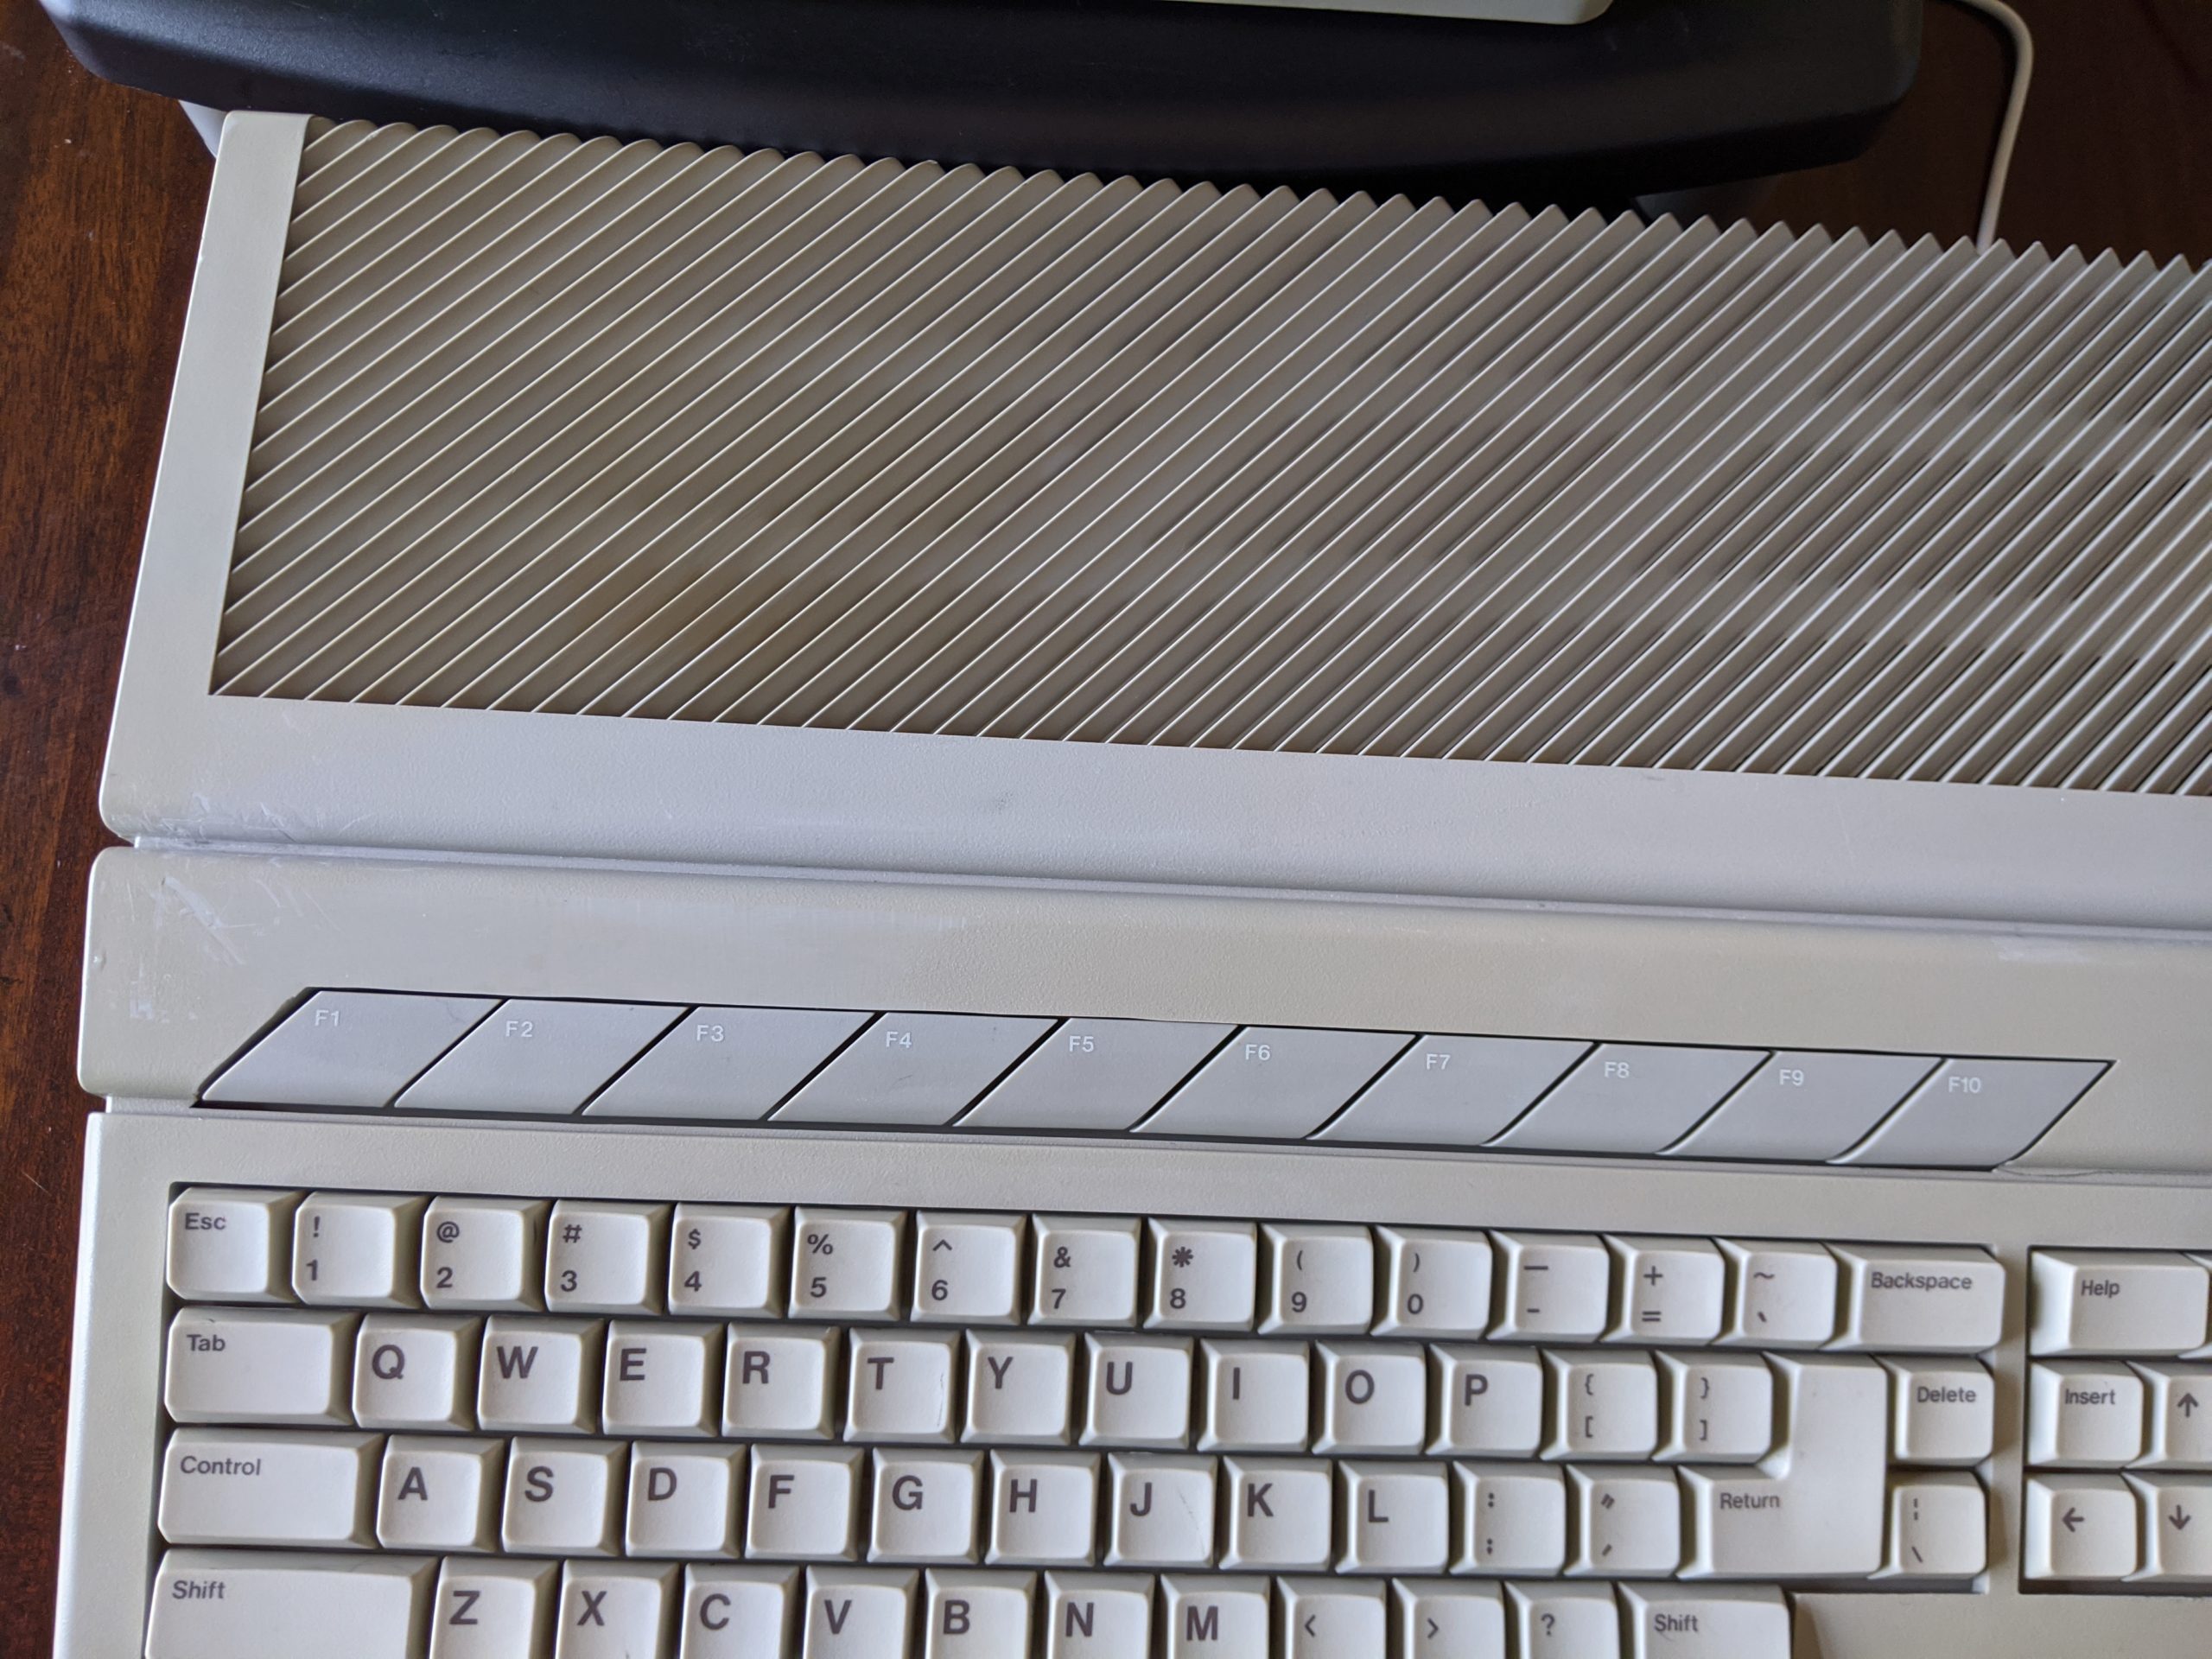
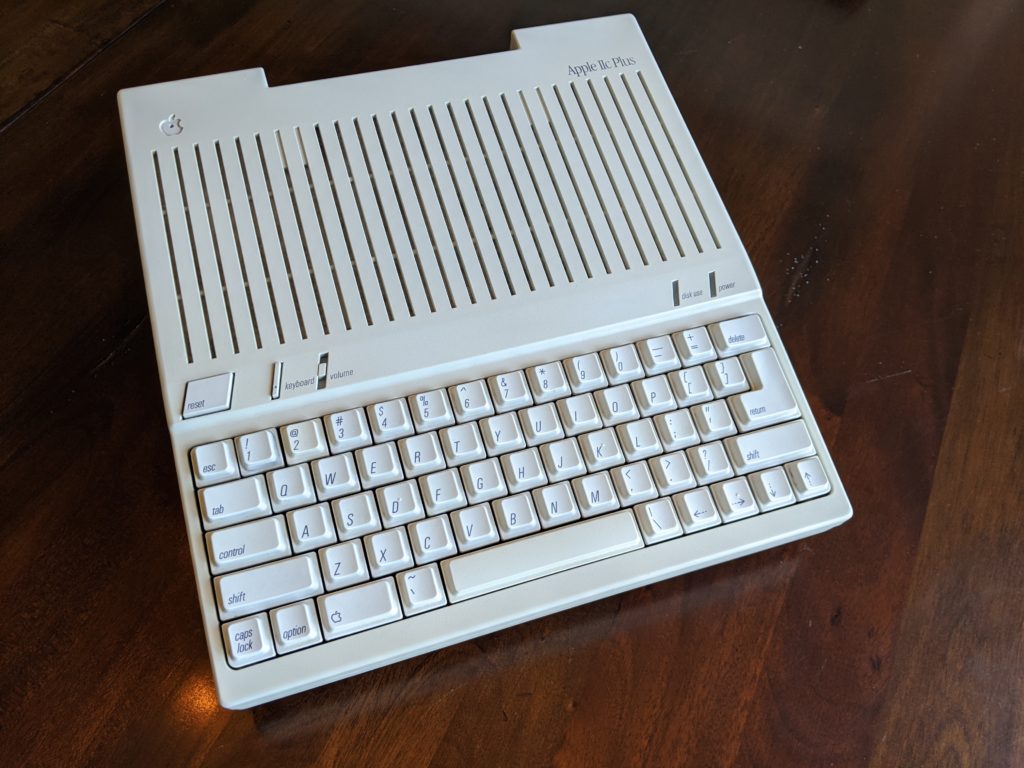
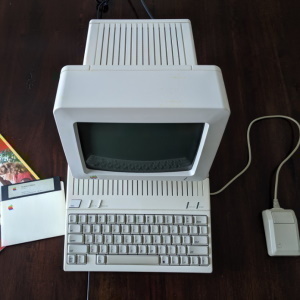
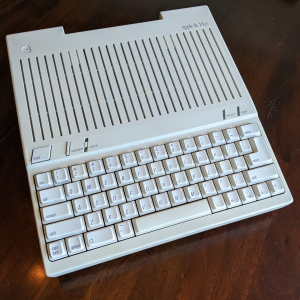
The Apple IIc+ occupies an odd spot in history. It represents the final iteration of the Apple II, and a slightly modernized twist on the portable Apple IIc (while shedding some of the portability that came with having an external power supply that could be replaced with a battery pack), increasing the clock speed and swapping out the 5.25″ floppy for a 3.5″. I’m not sure who the market was for this machine, since the Mac was well entrenched by this point (it even shares a naming convention with the Mac Plus, released the previous year). I guess it was kind of a swan song to the fans.
Cosmetically, I think its the most beautiful of the Apple IIs — already in a sleek design, the matching keyboard made the whole thing look more cohesive. Having a more accessible floppy disk format (and the fact that it could boot from either the internal drive or an external one) is nice when doing a restoration, but was probably frustrating for users at the time since most Apple II software came in the older format. The clock speed is a similar trade-off: yes its faster, but so much faster that lots of games don’t work properly.
I bought this unit from a Goodwill auction, missing the “2” key and the Apple logo. Apple Rescue of Denver had a 2 key from a standard Apple IIc that was a little off-color, but physically fit; they did not have the Apple logo. Everything worked when it arrived, and it was in excellent physical condition. It needed only a short, heavily diluted retro-bright bath, and some cleaning between the keys.
I re-capped the internal power supply, and cleaned the floppy drive. I got to play with MouseDesk on this unit, using a Floppy Emu and a mouse from my Mac Plus, but otherwise, could find no long term use case. The sale price will put me ahead, after parts, fees and shipping — but only on this one project. The surplus will immediately be applied to my NextStation restoration effort… those parts are expensive!
When I was young, my parents wanted to encourage my interest in computers, but couldn’t afford a new machine, so they bought a used Atari 800XL from a friend, and mostly let me have my way with it. My dad writes about being shocked when I took it apart. Of the many things I learned how to do with that Atari, war-dialing BBSes was one of my favorites. It was through these proto-online experiences that I learned about the Atari ST computers. I remember being shocked that the “1040” was a computer more powerful than mine — because my floppy drive had the moniker “1050.” That year, I asked a mall Santa for an Atari Falcon.
For more than two decades, I’d lusted after these fabled 16-bit Atari machines, but their relative rarity in North America meant they were too expensive to justify. I finally found a fellow nerd who traded my restored Apple IIGS for his Atari Mega ST 2. My excitement faded fast as I figured out why Atari didn’t survive as a purveyor of home computers…
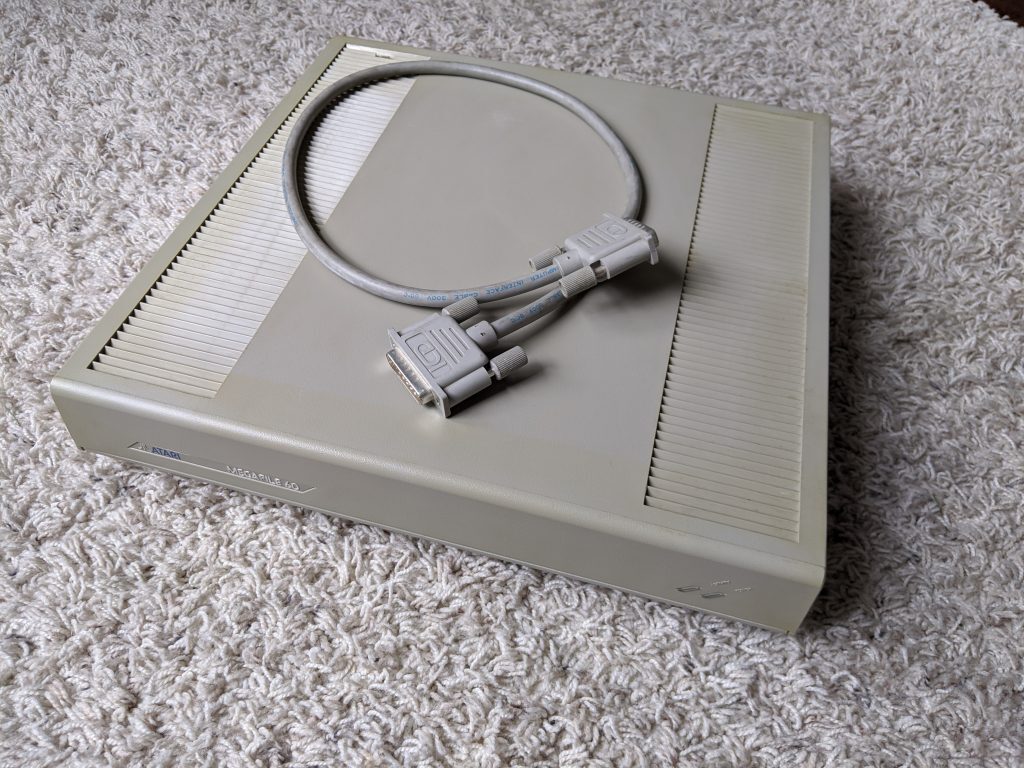
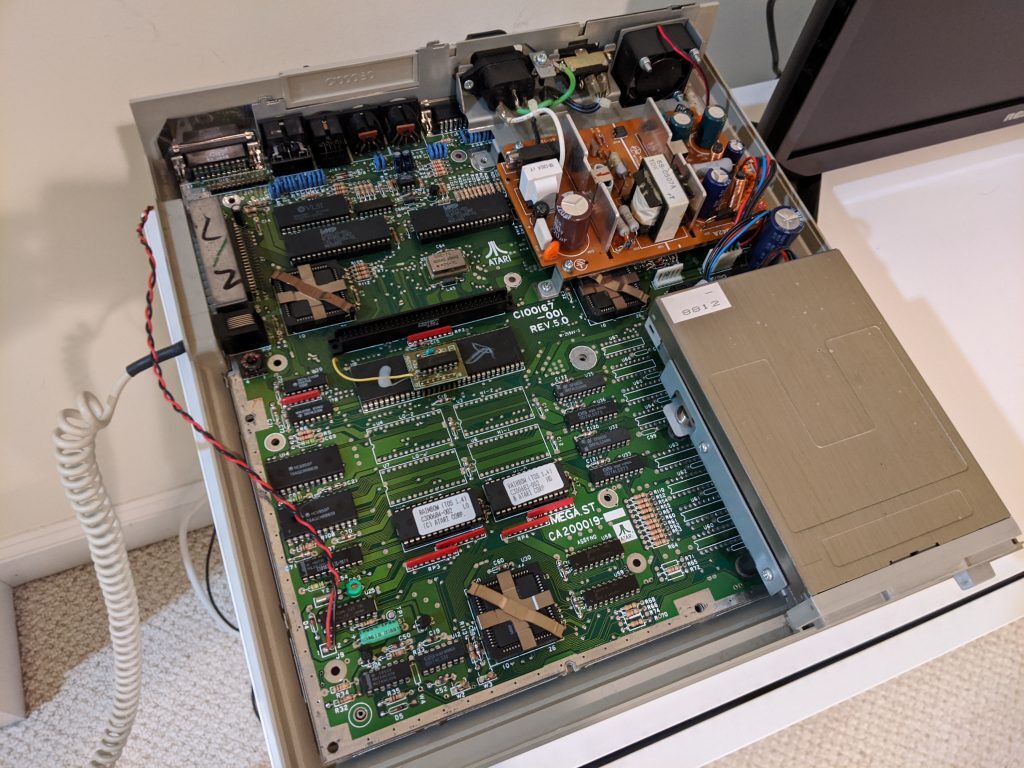
My Mega ST set-up came in stackable parts: the main computer, an external Megafile hard drive, and a high resolution gray-scale monitor. 2 of 3 parts were very yellowed, but in otherwise great cosmetic condition. The monitor sprang to life clear and sharp, the hard drive spun true, and the Atari itself booted quickly — but screamed the whole time. I figured this would be an easy repair, if that was the only issue.
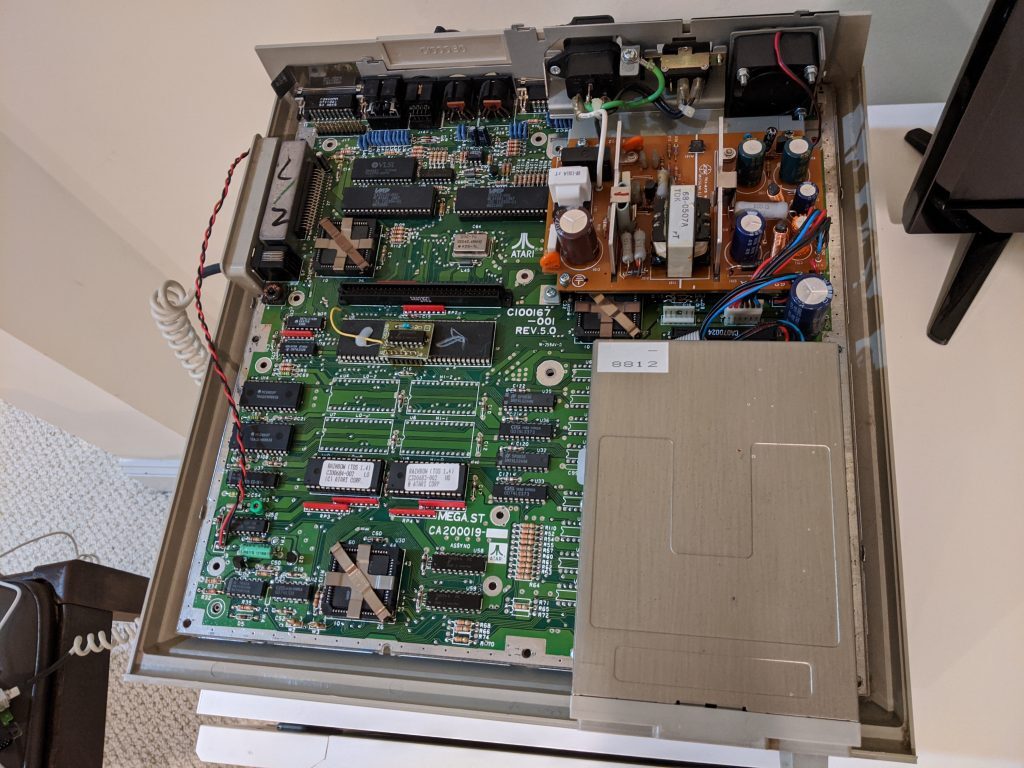
Dissembling the monitor proved too difficult to be worth it, so I tried a new retro-brighting technique: mostly a pure sun bath, combined with periodic painting on of some lightly diluted 40v liquid. The color was mostly restored, and there was no bleaching or staining. The Mega was easier to take apart — save for the ridiculous amount of metal shielding. The keyboard was similar, although I was horrified to find that each individual key-cap had its own separate rubber plunger, most of which rolled away and had to be chased across the rec room. My standard gentle retro-bright bathe cleaned these parts up nicely, and the color match with the monitor was spot on. While they were apart, I re-capped the logic board and power supply, and check continuity on the keyboard solder points and cable — since the screaming sound appeared to be a “stuck key” indication.
Next came the hard drive. Amazingly, the case color was still quite close to original, and even more incredible, the factory warranty stickers were unbroken. I decided it was best not to mess with it, and settled only for a warm cloth wipe down, and a gentle baking soda rub on a few stubborn spots.
Once everything was dry, I re-assembled it all and powered it back up. Same quick response, same screaming sound. I purchased a new keyboard cable from someone online, and waited to try again. Weeks later, same result. After repeated attempts, I found that 2-3 times in 10 boots, there’d be no scream, but any text entry field would immediately fill up with garbage character input from the keyboard. And 1 in 10 boots everything would work fine. Occasionally disconnecting and re-connecting the keyboard after booting would solve the problem.
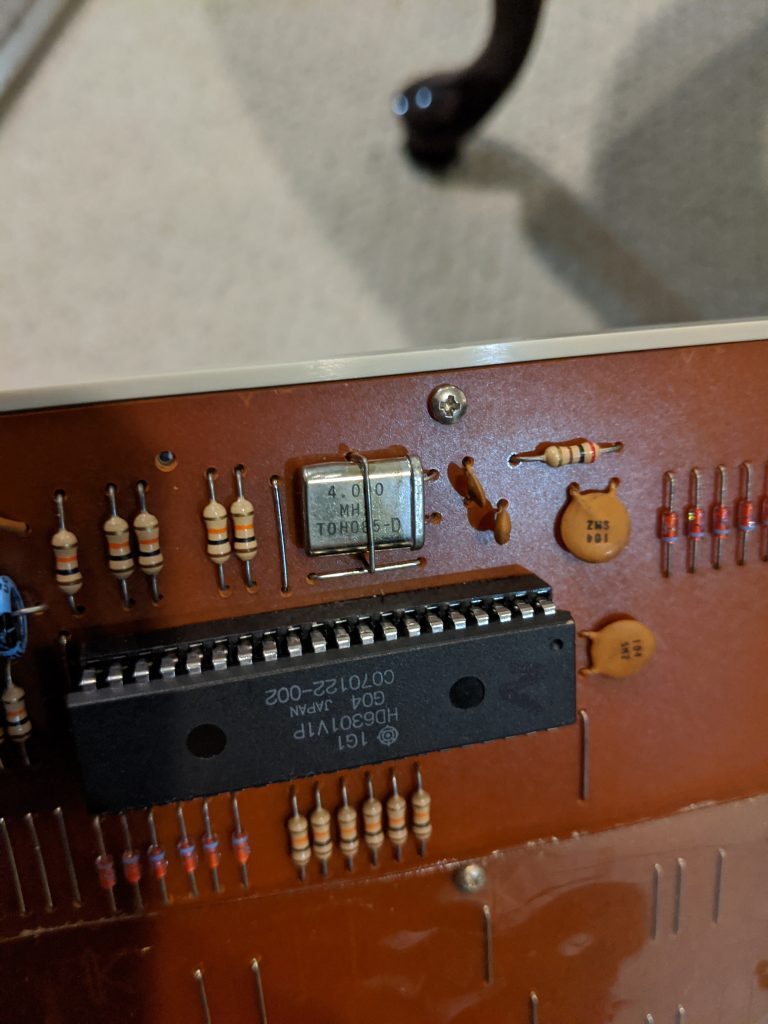
A YouTube video indicated a possible short or unintended ground on the logic board might be the culprit, but running the Mega bare on a static mat had no impact, and a close inspection with a loupe could find no bad traces. A fellow nerd suggested maybe a bad oscillator crystal on the keyboard, but swapping that fixed nothing. A replacement keyboard could only be sourced from Europe, at great cost, and with significant delay due to the pandemic’s impact on shipping. Finally a member of a Facebook group who’d purchased a previous restoration from me volunteered to send me a cap-less junk keyboard that I could use to narrow down the problem. Sure enough, the Mega was happy with that keyboard… unfortunately, the caps from my bad keyboard were not a fit, so I couldn’t combine them. Instead I swapped every significant electrical component from the working-junk keyboard with the bad-but-beautiful original. No change.
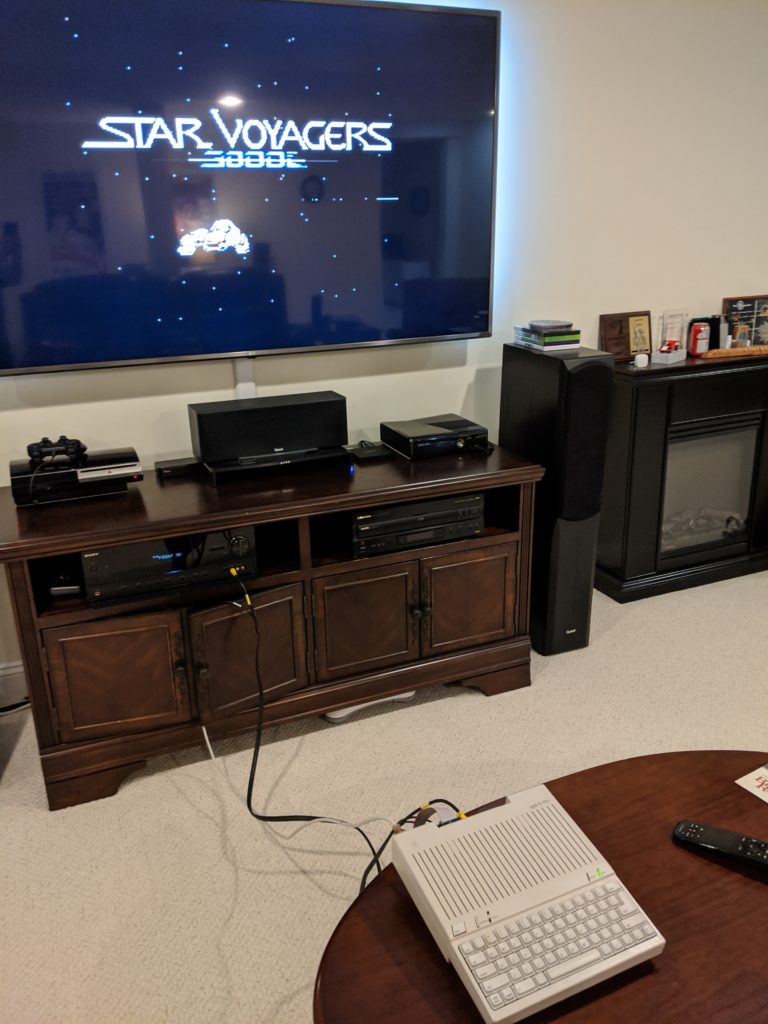
Determined that this project wouldn’t be a complete loss, I purchased a hard drive emulator (unfortunately dubbed the “UltraSATAN”) so I could load up some games… only to find that the disk would get corrupted within minutes of use. Discouraged, I found and purchased an Atari 1040ST to try to compare and isolate this problem. Eventually, I learned through forums that reliable hard disk access would require an OS upgrade. Incredibly, Atari’s approach to software updates was to replace ROM chips inside the computer — I ordered some from eBay, and after two tries, got a set that worked. I found a decent list of games that claimed to work in high-resolution mode, and curated a hard disk image using the Hatari emulator. About half the games were playable, but even less were fun. Oh well, maybe I need a color monitor for the fun ones…
This, it turns out, required an expensive custom cable, so it was back to eBay for an Atari video to SCART cable. Fortunately, I had an SCART to HDMI adapter that had served me well in the past. Unfortunately, the hand-made cable arrived with a short in it, and within minutes of plugging it in, smoke was pouring out of my HDMI adapter. The seller replaced the cable, and I bought a cheaper adapter on Amazon… which only showed one color. I returned it, and bought the more expensive adapter again. Finally, Atari in color on a modern monitor… at this point, I was so far in the hole on this project, that it was impossible to justify it to my wife/accountant.
My original goal had been to play with some MIDI software. I used to play piano quite well, and remember when I first learned about MIDI keyboards and got excited about this union of two of my interests. While our current Clavinova does MIDI, its of the USB variety, and adapters from USB to classic MIDI are unreasonably expensive. The only use case left was to try out some more games… unfortunately, the Atari joystick that had been in storage since my youth only had one working axis. Off to Amazon to order a replacement.
We did finally manage to try out a few games and have a little fun with the beast, but most of the joy, and all of the excitement was gone. Off all my restorations, this one is most clearly a failure. The Mega ST 2 looked and ran nice, and I found a buyer for it who already had a working keyboard, so I’m sure he was happy. The Megafile hard drive worked great, and another buyer got a decent deal to add to his collection. After selling, I got close enough to the break-even point that the boss allowed me to continue with other projects. And I still have the monitor and the 1040ST to play with… but those are another blog post.
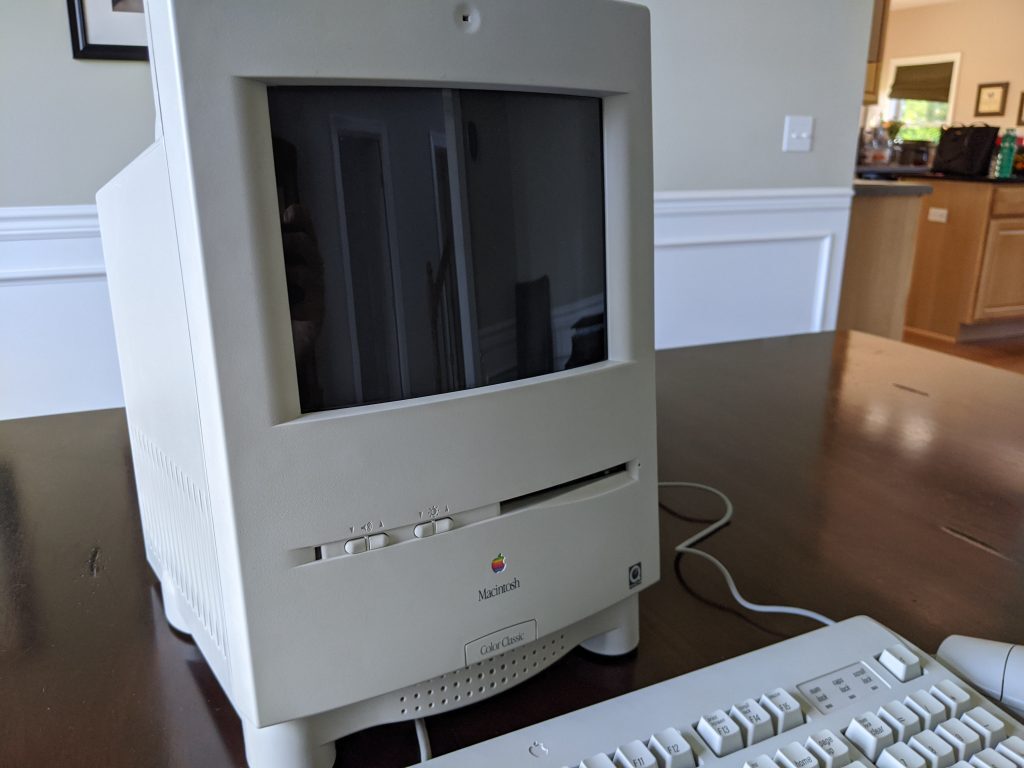
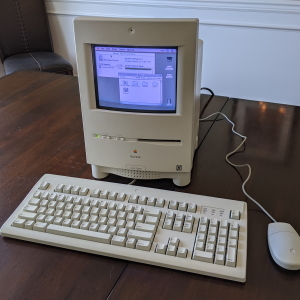
The Color Classic was the compact Mac that the fans wanted… almost. It unfortunately ended up with a slightly crippled system architecture — something only addressed in the Color Classic 2 (which was unfortunately never sold in the US.) Still the Color Classic (CC) was a cute and modernized take on the design that made the Mac famous.
Running the penultimate non-PPC Motorola CPU, the 68030, but limited to a 16-bit data path, the CC is poky on later versions of System 7, but runs well on 7.1. Its display does 256 colors, but at a non-standard resolution that prevented it from playing a significant subset of color Mac games (although its possible to work around with a pretty heavy-duty hardware mod that ups the display to 640×480). The CC shares a logic board design with the 68040-based Performa/LC 57x series boards, allowing a drop-in logic board upgrade dubbed “Mystic.” For those who don’t mind losing the back cover, the “Takky” upgrade involves installing a logic board from even later Macs, including PowerPCs, but requires some modification.
I chose to leave my Color Classic as close to stock as possible. It came from someone on a Facebook group who had two dead ones he was looking to unload. He sold it to me for $100 shipped, and it arrived yellowed, and covered in stickers and sticker residue, but with almost no damage to the case — and no clock battery leakage. Of course, none of that good news meant it would turn on. Cleaning the logic board and leaving it plugged in for 24 hours resulted in slight signs of life, but I couldn’t get it powered up until I thoroughly bathed the logic board (then thoroughly dried it.) After that, it booted exactly once — then the hard drive failed completely.
Still, that was enough to suggest it was salvageable. The fact that washing the board had an impact meant that the surface mount capacitors were leaking. This being my first experience with SMDs, I watched a solid two hours of YouTube videos covering a variety of techniques for removal, then practiced on a garbage board. I settled on the “snip, twist and pull” approach, to minimize the chance of trace damage. Soldering new ones on was a little more delicate then through-hole caps, but nothing I couldn’t handle. A full set of replacements was done over the course of an afternoon, and after another 8 hours plugged in, some cleaned drive heads, and a carefully built floppy boot disk, it was back to life!
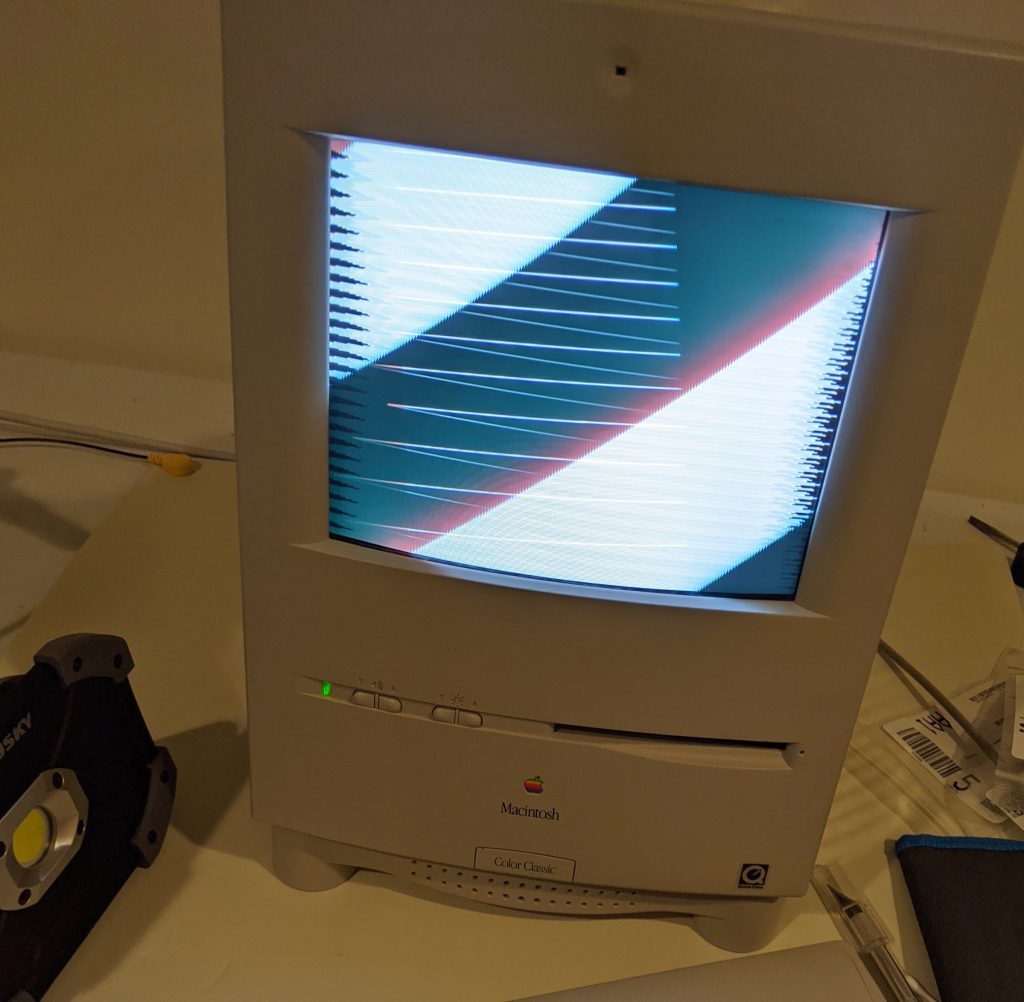
Next came the analog board — the need to be plugged-in for a long time indicated that those caps were at the end of their life too. While getting the analog board out was a pain in the butt, re-capping moved quickly. While I retro-brighted the case back to something closer to it’s original color, I re-capped half the board, and marked the ones I’d replaced, and tested it out. Everything worked, so the next day, I started the second half. With the final set replaced, I re-assembled my Color Classic and was delighted that there was no “charge up” period required — the Mac chimed instantly… then the screen turned a bright white, with lines through it. I yanked the power in terror, took it apart and quadruple checked the rating and polarity on every single capacitor, then re-assembled and tried again. I got the same result, but this time I put the boot disk in — and found that Mac whirred away at the floppy, booting happily. I was puzzled, and felt defeated. Soon afterward, my health took a turn, and the Color Classic ended up left in pieces on my work table for two months…
Not a happy Mac
Finally last week I felt up to re-visiting this project. I found someone willing to sell a replacement analog board, if all else failed, but I was determined to figure out what had gone wrong. I knew everything worked after 2/3rds of the re-capping was done, so at least the potential surface area for error was small. I fired it up again, and watched the slow floppy boot, then set up my multimeter to try to read voltage from some of the ports. As I did, the Mac settled into the desktop and the faintest shadow of the Apple Menu appeared in the top left corner of the screen!
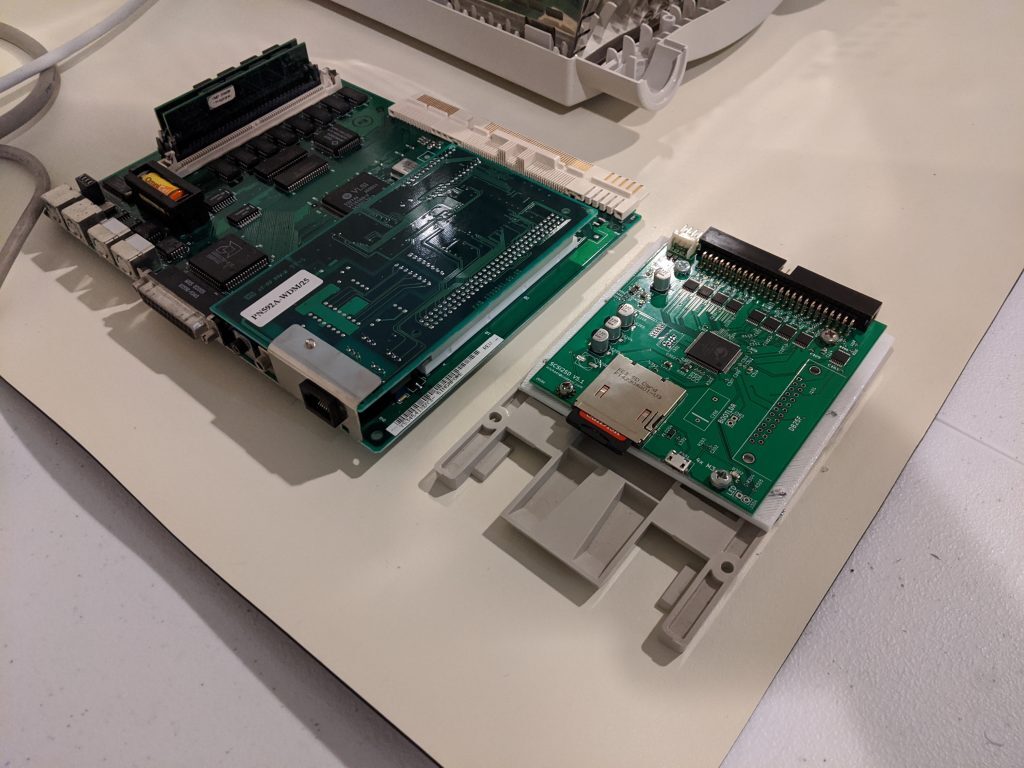
It turns out I hadn’t made an error at all. Some previous owner had cranked the display voltage (probably to try to extend the life of the old capacitors). A careful high-voltage adjustment with a plastic tool, and the picture resolved to something useable. More adjustments were needed, but the Mac was alive — and had been the whole time! All that was left was to find a working hard drive. Most SCSI drives of the era either have failed, or are about to, so I decided to go with a SCSI2SD v5.1. I loaded it into an external enclosure, and after some fiddling in Lido and some back and forth loading some bits from my Mac Plus, the Color Classic was happy. I had to 3D print an adapter to get the SCSI2SD onto the drive tray, but it fits in there solid, and provides more than 4GB of solid state storage.
I found an Farallon PDS network card on eBay, along with a driver floppy, and quickly got the Color Classic onto my AppleTalk network so I could pull some apps and games off my other Macs. I also loaded up a Recovery partition with the System 7.1 installer and necessary System Enabler — since it had been a pain in the butt to find. After a solid 8 hours of burn in, and a few more screen tweaks, this classy Color Classic runs like a dream. A few days later, it found a decent price, and a good home, with an eBay buyer who’d been trying to get a Color Mac of his own for quite some time.
A classic game on a Color Classic Mac in 256 beautiful colors!
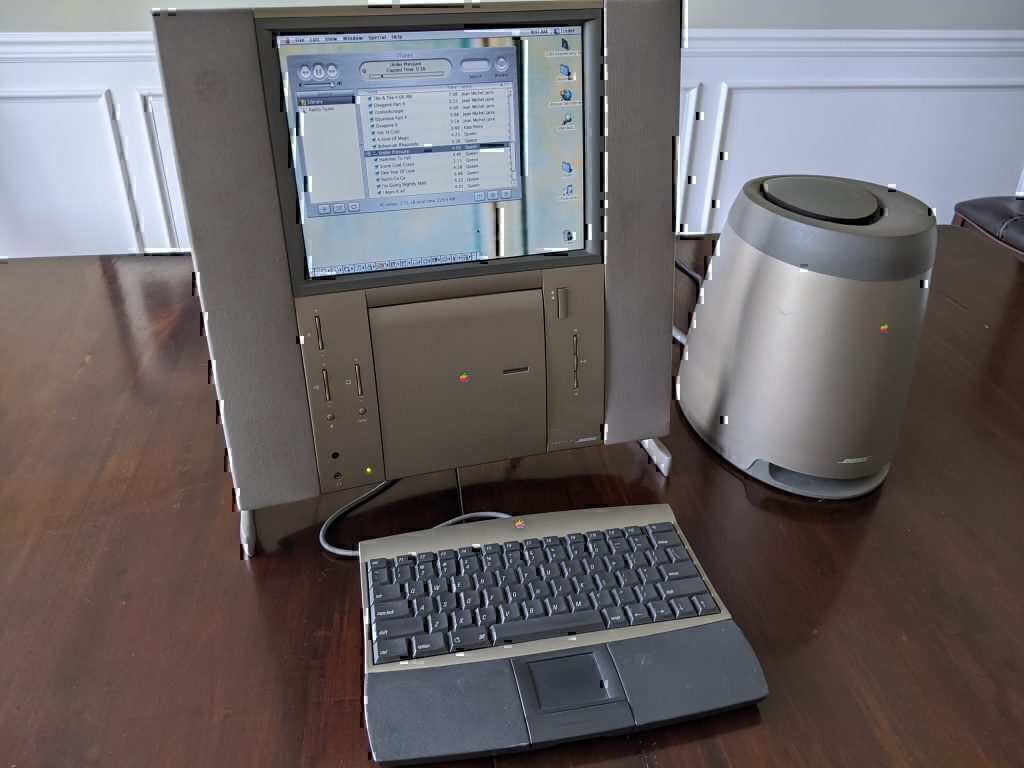
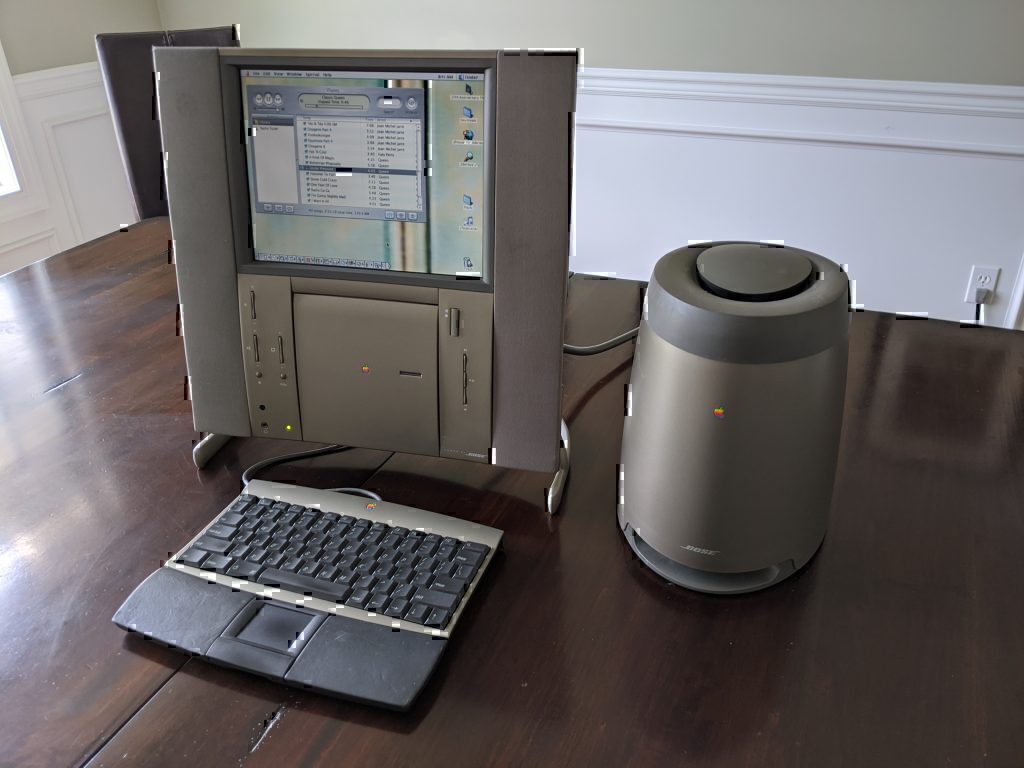
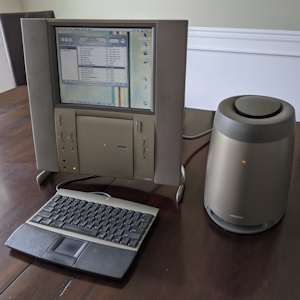
The Twentieth Anniversary Macintosh (better known as the TAM) is one of the most rare examples of Apple’s legacy hardware design. Conceived of years before the iMac, but by the same designer, the TAM was an expensive limited edition computer, created in Apple’s darkest hours to celebrate their survival to this point. According to legend, Steve Jobs said it represented everything he hated about what Apple had become.
In its initial run, at $7500 USD (over $11k in today’s money) it supposedly included an option for “white glove” delivery, where an Apple employee in a tuxedo, would arrive at your home or office via limo, and set it up for you. Over the course of its short life, the price would be reduced dramatically — but never enough to sell well. As a result, not many of them exist today.
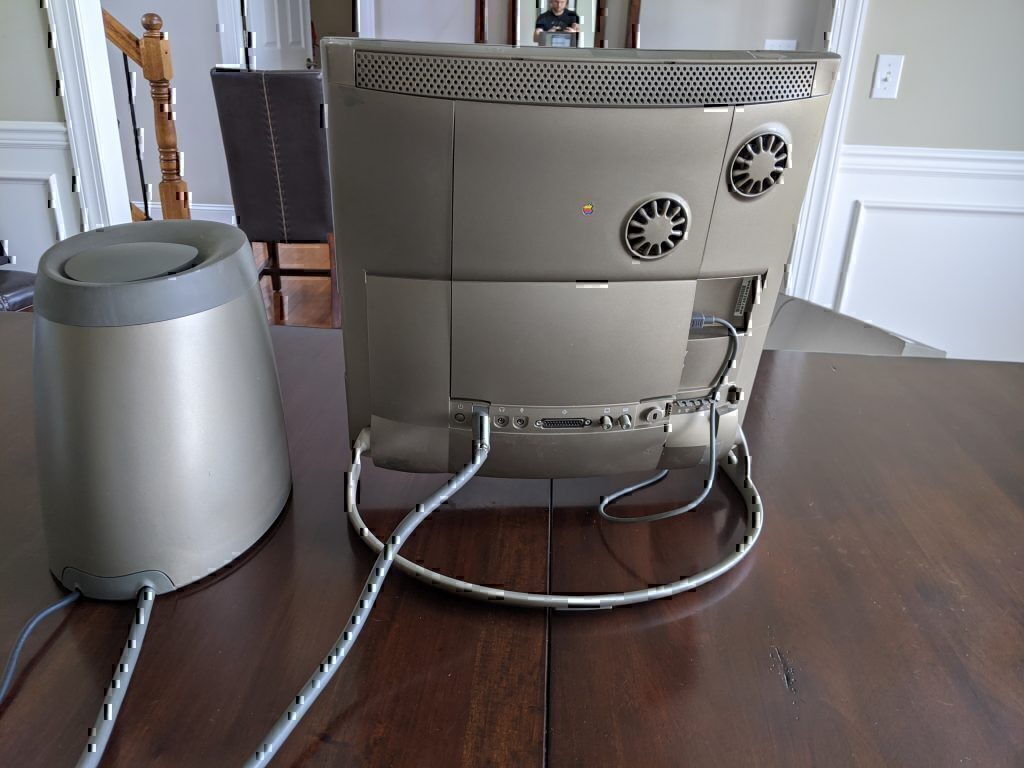
The design is striking — and polarizing — and harkens back to the all-in-one origins of the Macintosh, while leveraging then-modern technology (mostly drawn from their laptop line.) The power supply is external, and encased in a Bose sub-woofer, then connected by a strange locking “umbilical” chord that frequently causes audio issues. The keyboard, and integrated (but removable) trackpad are awful — but aesthetically pleasing, especially when tucked away under the unit, leaving a tiny footprint on your desk.
This effort wasn’t so much as restoration, as a retro-fit. I picked it up for a reasonable (but still expensive) price from a fellow hobbiest one State over, and as advertised, everything worked. The paint is peeling on the top, where a previous owner had apparently attached something with scotch tape, the umbilical is frayed a little, but does not cause the infamous buzz issue, and the impossible-to-find Comm Slot 2 riser adapter is cracked to the point of being basically unusable.
My main use case for the machine was to replace my handy but inglorious bridge machine — a Performa 6200CD. To do this, I would need a working ethernet card. Although I could make the included CS2 card work if I stood on one foot and held my tongue just right, it would fail too easily if the machine moved at all (due to the aforementioned adapter crack.) A dual PCI riser was included, but was not designed for the machine, so had a number of issues that I had to resolve.
Fortunately, the “fat back” expansion cover was included, but the position of a mounted PCI card that aligned with the external bracket left the card resting against the metal hard drive bracket — an electrical short waiting to happen. The same bracket also holds a fan. While I’m not sure the fan is strictly necessary, I decided I would have to create new brackets for both. My, relatively rudimentary, 3D printer skills came in handy, and once I replaced the aging and tiny spinning hard drive with a Compact Flash adapter, the metal components were almost entirely replaced with plastic ones.
Now I could safely mount two PCI cards — but the bracket only has space for one to stick out. While Ethernet was the primary goal, a secondary goal was a USB mouse. I tried hacking at a USB card to modify it to have internal USB connectors, but failed. Removing the metal mounting brackets from the PCI cards, and leaving off the external bracket from the expansion cover allowed me to have two cards installed — but left a gaping ugly hole in the side of my TAM.
Although the shape was unusual, and beyond my 3D design skills to match completely, I did manage to print off a replacement bracket, which I painted a dark gray, that manages to mostly fill the hole, without looking too much of a hack job.
While its technically possible to run OS X on the TAM, with a G3 upgrade card, apparently it carries some risk — and a high cost for the upgrade. Also, OS X doesn’t make a great bridge for really old Macs. Since I have a G4 Cube that can dual boot 9 and X, I decided to leave the TAM at 9.1. I’ll max out the RAM, when I can find some, but otherwise this project is done — and sitting proudly on my desk.
The STL files for my replacement brackets are available here:


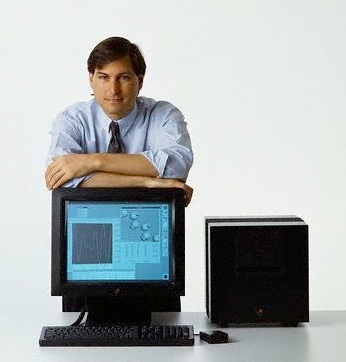 Steve Jobs followed up the Macintosh by getting